With the team here from our home church in Arkansas this week, it's a great opportunity to send back some mail! Quite a few of the thank-yous that we want to send can be hand-delivered via the office mail at church once the team returns home, so it's a good chance to save on postage as well.
I had originally planned on making the cards, but Miguel decided to have some printed at Office Depot (yes, there is Office Depot in Mexico!). As it turned out, however, he didn't print quite enough, so I got to make some anyway!
Correspondence with supporters and folks back home, as many missionaries know, is both a blessing and a curse...while I love picturing our friends and supporters getting a card from us in the mail, it is also quite a chore to hand-write all those notes! I would have to say that making the cards falls into the 'blessing' part, at least for me...I was sorry I didn't have to make more!
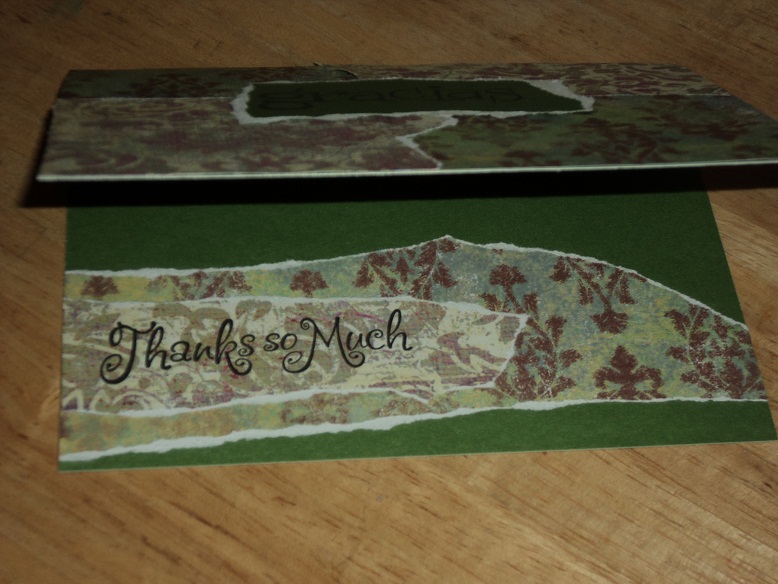
I experimented with several different designs, but the ones I liked the best were the ones with collage-style pieces of torn paper. They turned out really cute!
One the inside, I stamped the English "Thanks so much" on another torn strip...it's a good way to use up the scraps. It's a bit more clear on the actual card.
Here's another similar design in green. I think it was my favorite. There are two ways to tear the paper, one does not show the white core. I usually do not let the white core show, but it looked good here.
I used two scraps of paper for the inside of this one, but I did notice that it took away more writing space. Of course, that's fine if you just want to write a short note!
All righty then, back to work!
Showing posts with label card-making. Show all posts
Wednesday, July 18, 2012
Saturday, March 10, 2012
What Will be Keeping Me Busy
This is what will be keeping me busy for the next two weeks...getting all these cards ready to mail to our supporters!
There is a group coming from our home church in Arkansas next week, so this will be a great chance for us to send mail. The postal service isn't used very much here in Mexico, so we wait for these kinds of opportunity to send mail to the U.S. We're also looking forward to having the group here, it's a group of high school seniors accompanied by some leaders and our missions pastor. Miguel has been helping plan and coordinate their trip and will be hanging out with them while they are here.
I made all these cards last week, there are about 50 of them or so...I kind of lost count after a while and I secretly hope I will need to make some more because it was fun! I felt a bit sad when I was done because I think I really enjoy making the cards more than I enjoy writing in them! It's not that I don't like writing letters because I really do, especially imagining people receiving a little note from us, but I really do like making cards!
This is a fairly simple pattern. I used white or colored card stock and chose either a patterned or solid colored paper for the front panel. I stamped the front panel before pasting it (I really like to use a glue or tape runner) to the front of the card. Some of the cards say 'Thanks Very Much' and 'Gracias', some say 'greetings from Mexico!'. But this card would be cute as a birthday card or something else.
Side note: I often use the clear stamps (also called cling stamps) because then I can use the alphabet sets to write all different kinds of things or write in Spanish. There aren't many rubber stamps available in Spanish, so the alphabet sets have been really useful to me. I have invested in several different alphabet sets in various sizes in both the clear and rubber stamps. This also saves on storage since I don't have a lot of different stamps to keep track of.
On some of the papers, I took a napkin (a q-tip would have probably worked better, lol!) and rubbed some black ink around the edges of the panel. I really liked how it dressed up the card.
I stamped a matching flower pattern on different paper, again, either a solid color or print, and then I cut out the flower and used a double sided adhesive foam pad to make it stand out from the card. As an added touch, I pasted a flower and stamped a little 'hola' on the inside.
Cutting out the flowers was by far the most time-consuming part of making this card, but it was worth it because I really love how it turned out.
So, now I really need to get to work on writing in them!
Subscribe to:
Posts (Atom)


